Photoshop
Tutorial Details
Tool : Adobe PhotoshopEstimated Time : 20 Minutes
Difficulty level : Begginer

Create a new document of 600x600 px and name it ribbon .
Create a new layer . Now fill it with a light color . Now go Filter > Noise > Add Noise and add some noise to the layer to help create some texture . And set the layer opacity to 15%.

Create the box to place our image. Use the rectangle tool with a fixed dimension of 300×200 pixels.Place your image above the rectangle and change it to clipping mask.
Use the rectangle tool and draw the ribbon. Rotate it about 35 degrees. Use the free transform tool (Command/Ctrl + T or go to Edit > Free Transfrom). Make sure your ribbon’s corners extend beyond the image mask size.
Command/Ctrl + Click the vector mask of the “Clipping Mask” layer.We want our ribbon to extend slightly beyond the boundaries of the image, so expand the selection by going Select > Modify > Expand and expand the selection by about 4 pixels.
With your current selection, choose the “Ribbon” layer and click the “Add Layer Mask” at the bottom of the Layers panel.
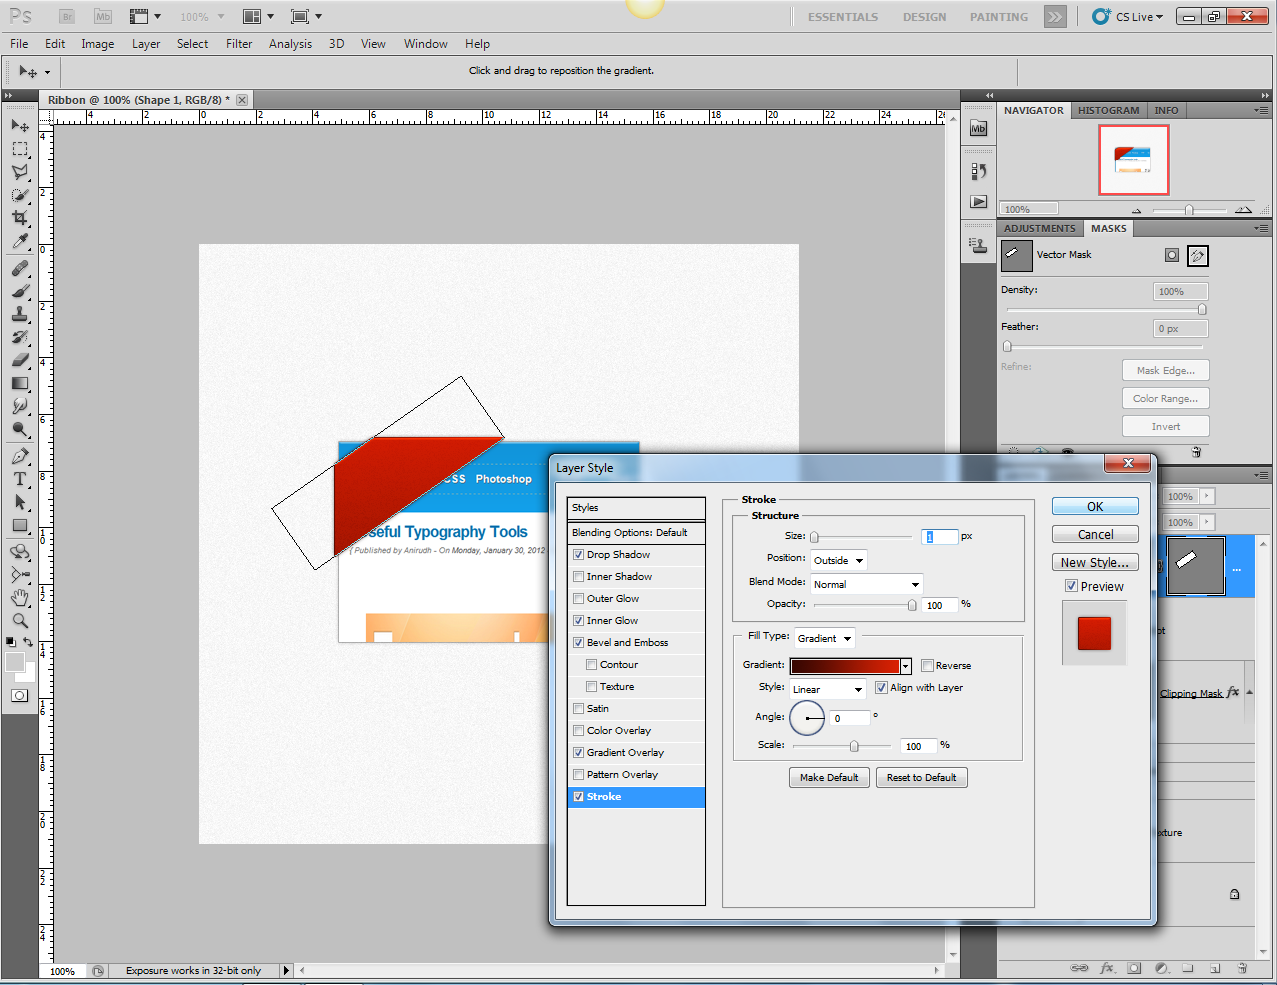
Let’s apply some layer styles to our ribbon shape.
Drop Shadow
Inner Glow
Bevel and Emboss
Let’s apply some layer styles to the ribbon. These styles give our ribbons some shadows, highlights, and texture to improve it’s look.


Ribbon Folding
Create a new layer and place it above the “Background Texture” and below the “Clipping Mask”. Select a dark color for the foreground color. Select the brush tool (small sized brush).Now use the brush to paint a small circle on both of the bottom edges. Because the layer is below the clipping mask, you’ll only see the dark part of the brush around the ribbon corners that overlap the image.
Finally we’ll add the stitching to our ribbon. Grab the text tool and type a bunch of hyphens. Then change the character settings as shown
Place the text on your ribbon and rotate it 35 degrees.
Duplicate that text and move it down to the bottom edge of the ribbon.
Now we will add text to the ribbon.
Place the text on your ribbon and rotate it 35 degrees.
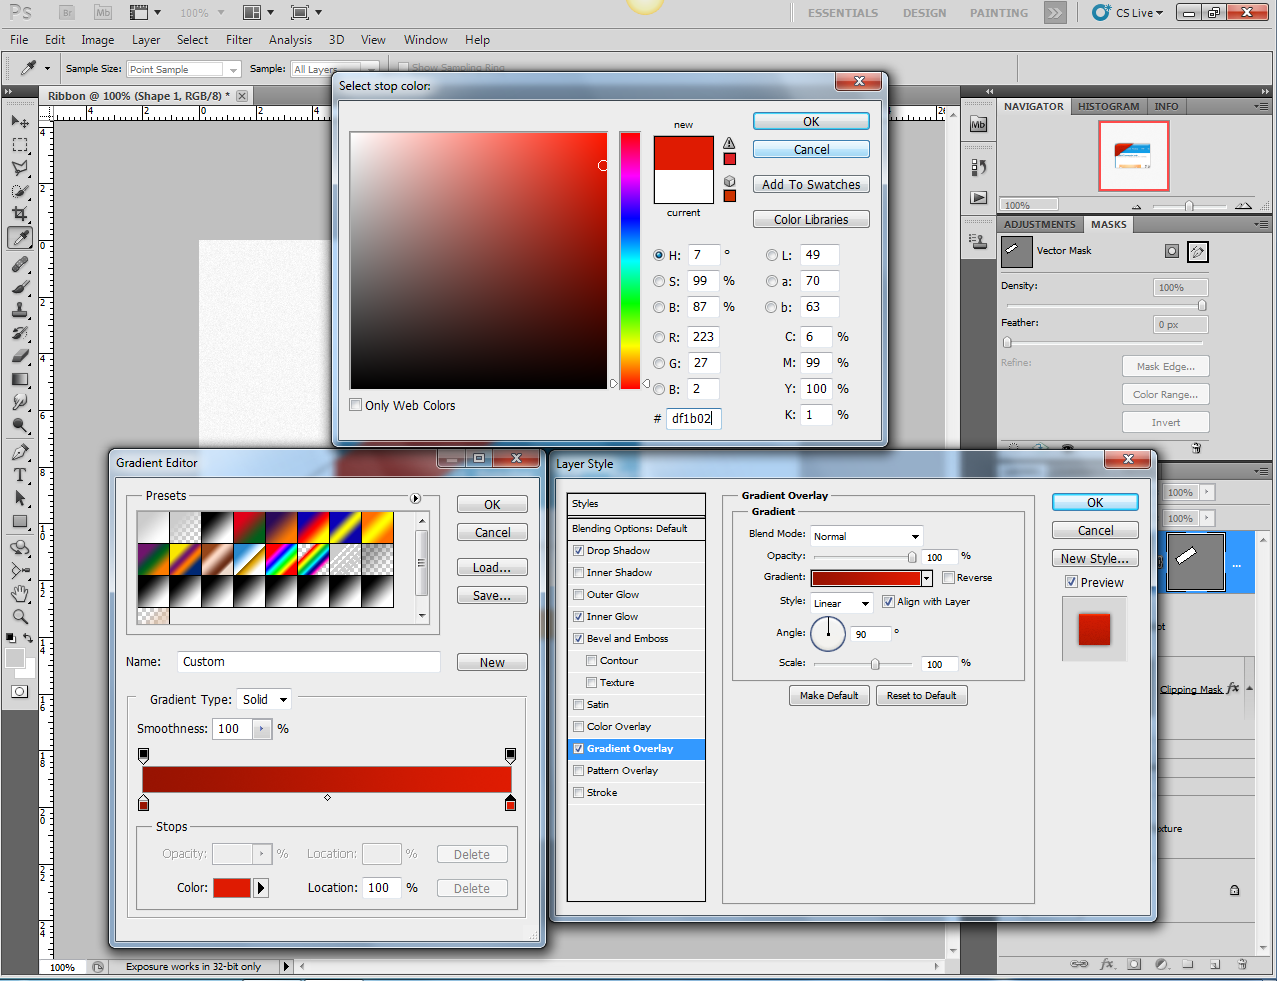
Now let’s add some layer styles to make our text appear highlighted on the ribbon.
Drop Shadow
Inner Shadow
Gradient Overlay
Final Image


